

How To Create A Wordpress Blog On Godaddy
When it comes to finding valuable information on the internet, there's no shortage of blogs boasting to have the best insights around. And why wouldn't they? Small businesses or bloggers positioning themselves as thought leaders can drive more traffic to their sites, increase brand recognition, and establish relationships with potential customers. Blogs offer a way to connect with your customers and/or readers in a manner that is personable, relatable and approachable. That's why it's helpful to understand how to start a WordPress blog and do so the right way.
This guide compiles the collective knowledge of experts whose insights into the blogosphere can help you develop a WordPress blog that works overtime for your business or personal brand.
Regardless of your niche, a blog can make a positive impact on your online identity. It's time to ditch the misconceptions that might be holding you back.
Having a blog is important. It's even more important to have a fully functioning and easy-to-use platform that ensures your words can be found, read and shared. Enter WordPress, a tool used by 27 percent of the web to create stunning blogs for a variety of uses. With customizable themes and designs, SEO- and mobile-friendly features and plenty of support, it's a surefire win for anyone looking to start a blog.
For the remainder of this guide, we'll explore the benefits of blogging, using WordPress to spread your message to the masses — from setup to publication — and measuring your content's success.
Step 1. Name your blog
Let's dig into the first step for starting a blog — giving it a name. How do you incorporate it with your brand? Is the matching domain name available? These are just a few things to consider when naming your blog, and we've got plenty of advice to make the process more productive.
Choosing a domain name is similar to choosing a company name — it requires a lot of thought and consideration. Your domain name is your identity on the web; you want to make sure you choose a domain name that not only fits your business, but is also easy to find and promote.

Pick the perfect domain name
- Make it easy to type. Finding a domain name that's easy to type is critical to online success. If you use slang (u instead of you) or words with multiple spellings (express vs. xpress), it might be harder for customers to find your site.
- Keep it short. If your domain name is long and complex, you risk customers mistyping or misspelling it. Short and simple is the way to go.
- Use keywords. Try using keywords that describe your business and the services you offer. For example, if you're a glass replacement business, you may want to register GlassRepair.com or GlassReplacement.com.
- Target your area. If your business is local, consider including your city or state in your domain name to make it easy for local customers to find and remember. Example: PhoenixGlassRepair.com or GlassRepair.nyc.
- Avoid numbers and hyphens. Numbers and hyphens are often misunderstood — people who hear your website address don't know if you're using a numeral (5) or it's spelled out (five) or they misplace or forget the dash. If you need these in your domain, register the different variations to be safe.
- Be memorable. There are millions of registered domain names, so having a domain that's catchy and memorable is essential. Once you've come up with a name, share it with close friends to make sure it sounds appealing and makes sense to others.
- Research it. Make sure the name you've selected isn't trademarked, copyrighted or being used by another company. It could result in a legal mess that could cost you a fortune, as well as your domain!
- Use an appropriate domain name extension. Extensions are suffixes, such as .com or .net, at the end of web addresses. These can have specific uses, so make sure to choose one that works for your business. The .com domain extension is far and away the most popular, but it can be tough to get a short and memorable .com domain name because it's been around for so long.
- Protect and build your brand. To protect your brand, you should purchase various domain extensions, as well as misspelled versions of your domain name. This prevents competitors from registering other versions and ensures your customers are directed to your website, even if they type it incorrectly.
- Act fast. Domain names sell quickly — so register your favorite domain names as soon as possible. If you're having trouble finding an available name, domain registrars like GoDaddy will suggest alternate names during your domain search to help you find the perfect domain name.
Choose a recognizable blog name
When you are launching your blog, you'll want to come up with a recognizable blog name that fits your style and personal brand. First, decide if you want a name that is literal or provocative. Whichever path you take, remember the blog names that also make the best domain names are striking and concise.
Next, brainstorm a list of words that describe:
- Your blog's topic area (e.g., parenting)
- Your blog's primary purpose (e.g., give parenting tips)
- Your target reader (e.g., parents)
- Your location (e.g., New York City)
- Your blog's tone (e.g., witty)
Note: If you plan to launch a blog for your personal brand, brainstorm a list of words that describe you and what you do.
Now head over to thesaurus.com and search for related words to add to your list.
Editing time. This is the really fun part, time to cull your list down to the words that resonate the most. Keep only those you think will stick.
Then start putting words together. Try different verb tenses and variations of the words on your shortlist. The goal is to come up with three strong blog name options. Send this shortlist to your most internet-savvy friends for feedback.
Choosing a domain that fits your blog
With the perfect blog name in hand it's time to find the complementary domain name. Let's say you've got your heart set on naming your blog "NY Parenting Tips." You might find that the .com version that name — nyparentingtips.com — is available. That's great. You've also got lots of other options.
You've worked hard to come up with the perfect, most recognizable blog name that is on the left of the dot, so now you can use the letters on the right of the dot to either complete a phrase or sentence or as a way to help categorize your blog.
In addition to traditional domain extensions, you now can register domain names with highly descriptive extensions — domain endings that describe your industry, interests, location, lifestyle and more.
Pro tip: If you're building a personal brand with your blog, look at registering a personal domain. The .me domain extension can help you tell your story at a glance.
5 naming tips for your bouncing new blog
Like the name you give a child, the naming of a blog is not something to be taken lightly. Here are some pointers to help you come up with a brand-worthy name for your bouncing new blog.
- Are you representin'? Consider whether you want to be the face of your blog. Do you want your name in the URL?
- Are you playing it straight? Decide if you want an eccentric name, a play on words, a name that means something only to you, or a name that blatantly states what people will find on your blog.
- It's like magic. If you're comfortable letting an algorithm pick your blog name, you could use an online name generator like Cool Name Ideas.
- Stick to the basics. Keep a few online naming basics in mind when you're coming up with your blog's moniker. It should be short (one or two words – three is pushing it), catchy, memorable, pronounceable, unique and easy to spell.
- Keep SEO in mind. Do a little research to figure out what keywords people type into search engines to look for the type of info you plan on putting out. Try to incorporate keywords into your blog name.
Additional resources for naming your blog
Picking a name is an important first step to start a WordPress blog. Make sure your blog name and related domain are just right with these helpful resources:

- Infographic: Choosing a blog name. Weigh the pros and cons of choosing a personal blog name that uses a full name vs. nickname.
- Why to brand your blog with a custom domain. Learn how a custom domain name can help you build your blog and business.
- Whimsy vs. clarity. Consider these factors when naming a blog (or a business).
- Getting a domain on the aftermarket. Get tips for using the domain aftermarket to find valuable domain names.
- Domain security best practices. Protect your new domain name with these tips.
2. Set up your blog
Now that you've chosen a blog name and registered the related domain, it's time to set up your blog. Read on for instructions surrounding initial setup, theme selection and more.
Let's explore how to build a WordPress website on your own with minimal headache and expense, and start building your online presence.
A WordPress website is easiest to think of in terms of layers. WordPress is the center-most core layer. It's the framework on which everything else rests. The content of your site (your text, images, videos, etc.) make up the next layer. This is the most important part of your website, and where you want to focus. The outermost layer is the theme, which is the window-dressing of how your content is displayed.
The beauty of WordPress is you can easily add content without having to alter your core structure.
You can expand, remove or edit without any change in functionality. You can also choose to change your look (i.e., your WordPress theme) without losing any content or again, changing the structure. WordPress handles HOW to display it all for you, so all you have to worry about is WHAT to display.
The final "big" component of any WordPress website that is worth mentioning are plugins. These are small, additional pieces of code you can add onto (or plug INto) your website to add non-standard functionality. Think of your mobile phone – some functions are included as part of the standard phone software, but you install an app when you want added capabilities.
Plugins are like apps for your WordPress website.
What you need to build a WordPress website
To create your first WordPress website, you'll need a domain name and hosting. And of course, you'll need WordPress — or you can use GoDaddy's Managed WordPress option and skip to the front of the line with an easy setup wizard designed to make creating a WordPress blog hassle free.
There are a few other things you'll need to get your website up and running:
- Content — What are you going to say?
- Images — Because an all-text website would be incredibly dull.
- Theme — WordPress comes with several defaults installed, and there are many free themes to choose from beyond the default options. If you prefer a certain look, there are also themes available for purchase from online sources.
Setting up your WordPress website
The single easiest way to set up WordPress is to start with a hosting account specifically designed for WordPress websites. With a GoDaddy Managed WordPress account, for example, WordPress is already installed for you.
Many hosts will offer a one-click option or simple directions to install WordPress directly from their control panel. Even without these, any hosting account will allow you to run WordPress provided you have a database in which to store the site information and a location to upload the WordPress files.
Editor's note: Read the full article for step-by-step instructions on creating a database, uploading WordPress files, installing WordPress, entering your credentials, setting your username and password, and setting your URL writing rules by configuring Permalinks (don't skip this step).
Getting to know the WordPress dashboard
You access your user dashboard at yourdomainname/wp-admin. This is where you will log in using your username and password. From the WordPress dashboard, you can control every aspect of your website. All of the main sections are located on the menu to the left. Under each of these main headings is a sub-menu of options.
- Posts are generally used for content that is updated frequently, such as blog articles. For content that does not change as frequently, such as an About Me section, it is better to use Pages.
- Under the Settings tab, you can change how your posts and pages display, set your time zone, change the administrator email address, and more.
- The Appearance menu is where you will control your theme and everything related to the visual display of your website. Here you can select a theme, upload a new theme, or make customizations to the theme you are using.
- The Plugins menu allows you to view plugins currently installed and add new ones when you wish. Only plugins that are activated can be used on your website.
- The Media page is where you can view, edit or delete images you have added to your WordPress website.
Choosing a theme for your WordPress website
While the most critical piece of any website is the content, you should also give careful attention to your theme.
The theme affects how your website is displayed and the overall impression it gives to your visitors.
There are many things to consider when choosing a good theme, but this article has some great tips to get you started. Overall, you want a theme that is stable, clean and easy to work with. Many themes are also highly customizable, allowing you to change colors and backgrounds with ease. This can help you achieve a more unique look that better suits your website design idea.
Adding content to your WordPress website
Nearly all content is added via a Post or a Page in WordPress:
- Click to add a new Page or Post.
- Enter the title information.
- Enter your content in the larger box.
You will see two tabs on the right, Visual and Text. Make sure you are editing in the Visual tab. The Text tab shows you the code markup if you need to make specific code changes.
Within the content box, you can add bolded text, italics, or even insert images. To insert images, click Add Media. The buttons across the top of the content box provide additional functionality.
Along the right-hand side, you will see some additional options. You can also save an item in draft format if it is not yet finished. This saves your changes, but does not make them live to your website. Only Posts and Pages that are published will be visible.
There is so much that WordPress can do that we have hardly scratched the surface. If you would like to learn more, check out the WordPress Codex and the WordPress article archive on the GoDaddy Blog.
WordPress powers more than 25 percent of websites across the world. But with 50,000+ plugins to choose from, thousands of themes, and a relatively complex interface, it can prove an overwhelming task for beginners to get started with WordPress.
Yes, there are plenty of excellent resources covering the basics of using WordPress. But wouldn't it be great if getting started with WordPress was more intuitive — a natural part of the new user experience?
WordPress Websites from GoDaddy make it easier for anyone to build a WordPress site from scratch.
From a startup wizard to responsive themes and baked-in SEO, this new site-building tool is tailor-made for small business owners who want to get started with WordPress in less time, no experience required.
- Quick Start Wizard. It begins with the Quick Start Wizard. You're asked some questions about your business and the site you're building, then we populate your site based on the information you provide.
- Starter themes. WordPress Websites also makes it simpler to choose a theme — a major pain point for many WordPress novices. We worked with Lift UX to craft a set of beautiful, open-sourced starter themes. They include the features and layouts you'd expect from a top-notch premium WordPress theme, including being responsive, so they look and work great on mobile devices.
- Starter content. From there, we automatically add the relevant pages and starter content, complete with images, forms, and other website essentials.
- Theme customization is a big part of what makes WordPress so appealing. But not everyone has the web dev chops to do it on their own. That's why we've partnered with Beaver Builder to bring the plugin's excellent drag-and-drop page website building capabilities to WordPress Websites.
- Quality images. Images are a crucial part of any website, but finding good images can be a real challenge. So we've included free access to thousands of high-quality, royalty-free images for virtually any industry.
- Built-in SEO. SEO is a must-have for businesses trying to get found online, so we've included GoDaddy's Search Engine Visibility with some plans. This step-by-step SEO wizard walks users through on-site optimization to help them get found on major search engines.
- Email marketing is another integral part of doing business online, so we've also bundled GoDaddy Email Marketing in all plans. A signup form is automatically added to your site to collect email addresses, and you can also add a form to any widget area.
- Video tutorials. If you want to grow your WordPress skills, check out WP101's excellent series of video tutorials. They're also included in WordPress Websites.
- In your language. WordPress is global, and so are we. So the WordPress Websites user interface and starter content is available in the 30+ languages for every market that GoDaddy serves.
- Robust, reliable hosting. WordPress Websites is built on the same infrastructure that powers our Managed WordPress hosting. That means server-side optimization, multi-cluster scalability, automated updates, daily backups, and 24/7 technical support are all included.
And since it's all WordPress, you'll always be able to add new features from the WordPress.org Plugin Directory or choose a new theme from the WordPress.org Theme Directory.
Additional resources for setting up your blog
Ready to learn more? Check out these additional resources that will help you start a WordPress blog and get it set up the right way:

- GoDaddy WordPress Websites. Build a powerful WordPress site fast with our exclusive Quick Start Wizard.
- How to design a website when you're not a website designer. Avoid newbie web design mistakes with this how-to guide.
- WordPress Codex. Repository for WordPress information and documentation.
- WP 101. Video tutorials to help you learn the ins and outs of WordPress.
3. Customize your blog
Now that you have the basic setup out of the way, it's time to customize your blog — the first step on your journey to grow a WordPress blog. Take advantage of WordPress's plethora of themes, widgets and plugins to create something truly unique that speaks to your brand.
When you first install WordPress, you might not be quite sure what to do next. If you're a WordPress beginner, it's normal to need a little help at this stage in the game. Let's look at what plugins you should install, what kind of theme you should choose, and some beginner tips that will help you get those first pieces of content up.
Choosing a WordPress theme
Your first WordPress theme might not be perfection — so you might want to do some theme shopping. There are thousands of WordPress themes available, so here are some tips on how to choose the right theme for you.
- Choose a theme that has a design format you like. You want it to look great, so choose a theme that has a look that you'll love.
- Make sure the theme is currently being developed, and regularly updated. Choose a theme that's current and well-supported to avoid major problems if your theme becomes vulnerable to malware infections or outdated in code.
- Choose a theme that has excellent reviews. Whether you've picked your theme from the WordPress.org Theme Directory or some other place, look for reviews on the theme. If there are no reviews or poor reviews, choose another theme.
- Don't choose a theme just because it looks like it has all the bells and whistles. Sometimes it's not such a great idea when a theme has all the things in the world built into it. It weighs down the theme, and can create conflict with other plugins.
- Choose a theme that comes with documentation to help you set it up right. Choose a theme that promises to provide documentation on how to set it up like the preview. Once you have set up the preview version, you've actually learned a little about how to use your theme, so you can change things out like your logo or some color schemes.
Using plugins
What are plugins?
Plugins extend the capabilities of WordPress. You can think of them as upgrades or add-ons for your website. For example:
- A form plugin, like Contact Form 7, will let you create forms in WordPress.
- An eCommerce plugin, like WooCommerce, will let you add an online store on your WordPress website.
- An analytics plugin, like Google Analytics by Yoast, will connect your website to Google Analytics.
Free vs. premium WordPress plugins
Generally speaking, there are two kinds of WordPress plugins: free and premium:
- Free plugins are low risk for the cost. They're an easy way to get started with plugin experimentation. The trade-off is that, in most cases, there's no guarantee for support with free plugins.
- What about Premium? In WordPress lingo "premium" is just another name for "paid." And just because you pay for a plugin doesn't mean it will necessarily be of better quality than a free plugin. Whenever you're considering paying for a plugin, it's a good idea to do some research about the plugin first.
Where do plugins come from?
There are three major sources of plugins:
- The WordPress Plugin Directory is the most popular source. All of the plugins in the directory are free to use. For each plugin you'll find an overview of its features, reviews from users, and a compatibility rating for different versions of WordPress.
- Commercial marketplaces such as CodeCanyon act as a "middle man" between plugin developers and users. The quality of marketplace plugins, and the level of support they have, will depend on the individual plugin author.
- Developer websites enable you to buy a plugin directly from the developer. Documentation, support, and complementary plugins (e.g. extensions or add-ons) will often be found on the same developer site.
Recommended plugins
There are a few really essential plugins you need as a WordPress beginner, to build a sturdy foundation for your blog.
- Security plugin. The majority of hackings, code injections and malware incidents happen randomly. A security plugin can inform you of the infection, and clean it for you so you can get back to what you like doing, like creating content.
- Backup plugin. Sometimes you make a mistake, and that's where a backup plugin can help. If you have GoDaddy Managed WordPress, backups are included. For other shared hosting plans, you might find UpdraftPlus is a strong backup option for your WordPress site.
- Contact form plugin. A contact form makes it easy for website visitors to get in touch with you, while helping to protect you from unwanted emails. Ninja Forms is a robust, free plugin that's easy to use.
- Social share button plugin. Placing social share buttons on your articles allows your blog readers to easily share your post to popular social networks like Facebook, Twitter, Pinterest and LinkedIn. Try a simple plugin like SumoMe.
- SEO plugin. A plugin like Yoast SEO for WordPress can help guide you through optimizing your blog content for search engines. The Yoast SEO plugin also gives you an analysis tool to tell you if your blog post is lacking keywords, images and more features that could help your article rank better.
- Traffic tracking plugin. If you plan to market your website or make money from it, you need to track your traffic. Google Analytics by MonsterInsights allows you to add Google Analytics tracking so you can keep tabs on your website visitors' behavior.
Installing WordPress plugins
There are three ways to install plugins:
- Installing a plugin from the WordPress Plugin Directory. This is the easiest method, but only works for plugins that are available in the Directory.
- Uploading a plugin .zip file. This is the easiest method for installing plugins purchased from a marketplace or developer website.
- Manually installing via FTP. This is the most complicated method, requiring some knowledge of FTP. It's typically done when, for whatever reason, you're unable to use the other two methods.
What about plugin updates?
Like WordPress itself, your plugins will receive periodic updates. These updates typically fix bugs in the plugin code, patch security holes, or improve the plugin in some other way. While WordPress plugin developers try their best to ensure their updates won't break anything, stuff happens. Sometimes an unexpected hiccup during a plugin update can cause bigger problems.
To play it safe, you can create a staging version of your site. (Here's the rundown on how to do it with GoDaddy's Managed WordPress).
You can test your plugin updates on the staging site before running them on your live (production) website. It's a bit of extra work, but the precaution can be well worth it — especially if you're working on a business website and can't afford any downtime!
Additional resources for customizing your blog
If you want to learn more about installing and managing WordPress plugins, widgets and further customization, here are a few great resources:
- Ignore these WordPress dashboard features. No, you don't need to know everything.
- All about WordPress themes. Get the scoop on how WordPress themes work.
- Managing Plugins (WordPressCodex). Get info straight from the gurus over at WordPress.
- 15 things you must do with Yoast SEO. Here are 15 things you must do after installing Yoast to make sure your site benefits from this killer plugin.
- Plugins blocklisted from GoDaddy Managed WordPress. Check out this help page to ensure you're using accepted plugins on your site.
- Yoast's WordPress SEO Guide. Yoast is a robust tool — get all the know-how direct from the creators.
- Creating a Ninja Forms WordPress contact form. Make sure your readers can reach you. Add a Ninja Forms contact form to your WordPress site.
- Creating a contact widget in WordPress. Looking for other contact form options? There are plenty of widgets that can get the job done.
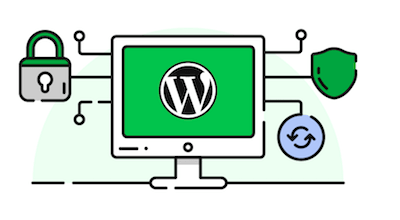
4. Secure your blog
You've spent a lot of time to start a WordPress blog and then even more time perfecting the look and feel of your WordPress blog. The last thing you want is to leave it open for security vulnerabilities. As you begin to grow your WordPress blog, the following articles will help you get started on the path to a more secure WordPress site.
WordPress security starts with you
I can't emphasize enough how important this idea is when it comes to caring for and maintaining your WordPress website. When you launch a new WordPress site, you become a website owner, and as a website owner, it is your responsibility to take care of it, to care for it, and to keep it safe and healthy. The good news is that you don't have to be a tech-wizard to keep your WordPress site secure. Even if you're non-technical, you can take steps to improve WordPress security. Here's how.
1. Use strong, unique passwords and a password manager. The most simple website security measure you can take is to use strong, unique passwords. When creating your passwords you should make sure they include:
- More than eight characters
- A mix of uppercase and lowercase letters
- At least one number
- At least one special character
Do not use the same password for multiple websites or online profiles, and do not use your WordPress password for anything else — especially for a social media profile. Use a password manager like LastPass or 1Password to manage all of your unique passwords and provide you with one master password.
2. Do not share your password with anyone. Your WordPress password is your WordPress password. Do not share it with anyone else, not even your team members or business partners.
3. Update WordPress every time an update is available. While incremental WordPress updates are pushed out automatically so you don't have to lift a finger to update your site to the newest version of the software, the major updates don't work the same way. For major releases it is up to you to update WordPress to the latest release.
To protect the security of your site it is best to always keep your sites updated to the most current version of WordPress.
4. Keep all WordPress plugins updated to the most current version. If you have five plugins installed on your WordPress site that are two to three versions out of date, every one of those plugins could post a security threat to your site. Every time a plugin releases an update, you should back up your site and update the plugin.
5. Keep your theme updated to the most current version. It is important to delete any WordPress themes that you are not using from your site.
6. Disable and delete all unused plugins. Trust me, the last thing you want to deal with is managing and keeping plugins you're not even using up to date. Disable and delete them. Even unused plugins can offer a backdoor into your blog for a hacker.
7. Invest in managed WordPress hosting. Not sure how to perform a full backup of your site? Don't want the stress of keeping WordPress up to date? Want better security, speed, and performance? Skip the shared hosting and go with a managed WordPress hosting solution.
8. Actively manage cPanel and/or FTP access. Just as you should never share your WordPress password with someone else, you should never share your cPanel or FTP password with anyone else.
9. Keep your operating system, all software and browsers current. Your WordPress site can become vulnerable to malware attacks and security hacks through outdated software on your computer, including old operating systems, and old browser versions.
10. Encrypt your home/office WiFi network. When your home WiFi network and office WiFi network are unencrypted, the data is passed through the network in plain text and anyone can log into your network and see everything that is being transferred. You should never log into your WordPress site on an unencrypted WiFi network.
Many people think securing a website with SSL (SSL encryption) is necessary only if they're selling products or services via their website and collecting credit card or payment information. What many website owners do not realize is that SSL encryption has other very important benefits for small business owners.
What exactly is SSL encryption?
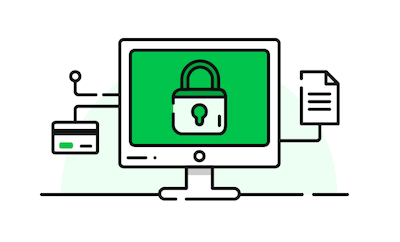
SSL, which stands for Secure Sockets Layer, is an encryption technology that creates a secure connection between your website's server and your website visitor's web browser. This allows for information to be protected during transmission between the two.
Without SSL encryption any computer could intercept the transmission from your browser to the server.
This includes the transmission of credit card numbers, usernames and passwords, and other sensitive information.
When your site is secured you'll see that little green lock in the left corner of your browser's location bar, followed by the website URL beginning with HTTPS. Data that is sent using HTTPS provides three key layers of protection:
- Authentication: Confirms visitors are on the right website, yours, and builds trust.
- Data integrity: Customer data cannot be corrupted or modified.
- Encryption: Visitor activity cannot be intercepted while browsing your website.
Time to secure your blog: Less than 1 hour to start, then as needed
Additional resources for securing your blog
Want to learn more about securing your WordPress site? Check out these additional resources:
- How to stay on top of WordPress security issues. WordPress is an open-source platform — take note of these tips to stay on top of security issues.
- How to secure your WordPress website. Take these four easy steps to secure your WordPress site.
- Security tips for plugins, themes and extensions. Don't forget to keep the extras safe.
- How to safely share user access to your WordPress site. Give access to your designer or developer without granting them the keys to the kingdom.
- Video: What is an SSL certificate?. Watch to learn the basics of SSL certificates.
- How to install the best free WordPress security plugin. A step-by-step guide for installing the free iThemes Security plugin.
- Strong website monitoring tools. Stay on top of page load time, performance and security checks with these tools and tips.
5. Publish content on your blog
Wow! Way to grow a WordPress blog! You've selected a name, set up your site, customized your blog, and added all the necessary security, and now it's time for the fun part — publishing content. Read on to learn how to establish yourself as a blogger, create strong content, plan for articles and more.
When done well, combining content, SEO and social media strategy creates a potent inbound marketing concoction that drives sales while constantly increasing in overall value. But effective content marketing is about more than just showing up and blogging.
You might be sharing the valuable piece of advice in the world about your subject, but if your content doesn't rank on a search engine results page, it won't get you very far.
The good news is that with a little planning and discipline, it's easy to create content that has an impact, both on your search engine rankings and on your bottom line. The trick is to organize your attack with an annual editorial calendar that will serve your SEO needs as well as your overall marketing needs.
Start with keyword research
The most important part of planning your editorial calendar is buckling down and doing some serious keywords research. Use Google's Keyword Planner to find terms related to the starter keywords most commonly associated with your business — helping you expand into other keywords and keyword phrases that work for you.
Once you have some keywords that seem to be pretty promising, the next step is to bring them over to Google and try them out. You want to look at a number of things:
- What articles show up when you run a search?
- What are the auto-suggestions generated as you type in your keyword?
- What questions haven't been answered by the top ranked pages so far?
If you want to take your keyword research even further, there are many other tools that I recommend.
Turn keywords into editorial calendar themes
As you look at your keywords, themes will start to emerge, which will let you organize everything into broad categories. For planning an annual calendar, I like to find three core themes and nine supplemental themes — a theme for each month.
A core theme is something you'd find on your home page, in your website's navigation, or even in the title. A supplemental theme is not quite as important, but still a major component of your brand.
One you have your themes, you can look at the calendar and organize them based on what's going on in each particular month. From there it's a matter of populating individual months with ideas for content, and perhaps breaking those jobs down into smaller tasks like research, outlining, first drafts, and so on.
Write blog posts that convert readers to customers
When you write a blog post, what is the real reason you cast your content out into the world? If you're a business owner, the answer to that question should be easy to see: You're writing a blog post so you can use your content to convert your readers into customers. Your primary goal is to generate interest in products and services. Here's how:
- Build your topics from your services and solutions. Write down the products or services you offer. Then write down the product's or service's solutions. Now turn each solution into a blog topic that gives the user information about how to solve the problem on their own.
- Show off your expertise. You've pulled in your target audience with an engaging topic; now deliver on the promise with a piece of content that reflects your expertise. Highlight your unique selling proposition by sharing details about your special process or thoughts on the topic.
- Create a desire for something you do or sell. You've given your reader information about how to solve their problem, now throw out a small pitch. Remind them that what they want or need is attainable — using the tips and info you provided.
- Add a crystal clear call-to-action. End your post by telling the reader exactly what they need to do to make it happen. You can use a call-to-action that goes right for the sale, or you can take the reader through a slower sales process by offering another piece of content that further shows how you can solve the problem.
If you are a businessperson wondering if a blog can really help your small business, the answer is yes. But in order to make your efforts effective, we're going to have use our blogs like virtual storefronts.
A professional blog will:
- Use your knowledge to bring people closer.
- Build authority on the web.
- Get in potential customers' heads, even if you don't get their business right away.
Additional resources for writing your blog content
There are a lot of different ways to publish content on your blog. If you want to expand further, check out these additional resources:
- The secret to writing engaging content quickly. Struggling for words? Learn how to write, revise and write again to boost your skills.
- Curating content for your blog. This content curation method will make your blogging life easier.
- Write your own damn website content. From not burying the lede to creating headline magic, a pro writer gives tips to writing website content.
- 7 places to find royalty-free images. You don't have to pay too much for high-quality images. Look here first.
- Are you getting too personal on your blog?. Just like you don't tell your mother everything, there are certain things you should keep off your blog.
6. Get eyes on your blog
Now that you've got some kick-ass content live on your blog, it's time to get some eyes on your work. Read on to learn how to grow a WordPress blog via SEO, social sharing, guest posts and more.
Do you hear the words Search Engine Optimization and immediately conjure up a bunch of scraped content stuffed with artificial-sounding keywords? Or maybe you know you need to up your blog SEO in order to appear in the search engines, but you just don't know where to get started.
No worries. Read on for some top tactics to make your blog rank better in search engines and show up for your top keywords — all in seven simple steps.

- Choose one keyword theme per page or post. We often think we need to rank for a really competitive "magic phrase" and that our main home page should be what shows up in search results. But search engines actually index separate pages and blog posts, so you can have a ton of different keyword-optimized posts that act as doors for people to enter your website through. Focus on a specific keyword theme.
- Research the keyword. Check out how much competition your keyword has — and whether anyone is even searching for it. You might think that people are searching for "Brooklyn restaurants," but what they're really searching for is "Brooklyn TexMex restaurants"… and if you own a TexMex restaurant, then you know you'll want to pick the most specific keyword. Google Trends is an easy tool for keyword research.
- Work that keyword! Since we're talking about blog SEO, include the keyword in the title of the post, in at least one subheadings, the first paragraph of your blog post, and naturally throughout the rest of your copy.
- Fill out your meta tags. Depending on your blogging platform, you might have built-in fields to specify a page's meta description, title, and keyword tags, or you might need to install a plugin. If you're on WordPress, I recommend WordPress SEO by Yoast. Once it's installed, you'll see three new fields to fill out each time you publish a blog post.
- Include your keyword in Image Alt text. If you add an image to your post, make sure that the "alt text" (alternate text) on the image has your keyword in it. Everything in your post is a signal to the search engines.
- Get some inbound links. Now that you have your posts geared toward specific keywords, it's time to get some links to your content. There are many different ways to get the search engines to recognize your new post … some of the easiest ones are to share your post on social media.
- Publish great content. Make everything you publish on your blog something that's worth reading and sharing. When you publish great content, the search engines won't be able to stay away, and more people will find you, too!
Establish yourself and build trust
Building an email newsletter grants you the chance to further establish your expertise, offering exclusive content that might never even appear on your blog. Chelsea uses a few great content strategies in her email newsletters:
- Weekly recap. In a more condensed fashion, Chelsea recaps the posts that went up on her blog during the week and links her readers to them. For anyone who might have missed her individual blasts, this is a nice at-a-glance review of the content that slipped past.
- Travel feature. Though Chelsea got her start in fashion, a newly growing component of truelane is the Travel section. In this email, she uses her newsletter as an opportunity to remind her readers that she's writing travel posts, too — and she links them to her favorite one from the past week.
- Personal touch. We get a personal window into Chelsea's life as she heads to Nashville for the weekend. Plus, we get to bask in great television together.
- Social media. At the bottom, Chelsea's "Social Standouts" section aggregates her favorite truelane social media posts from the week. Now, her email subscribers get the chance to check her out on Instagram and other social platforms, and the outreach is full-circle.
The higher up you place a link in your content, the more people will click it.
Another beautiful quality of email marketing is that it empowers you to stretch beyond the thematic limitations of your blog, establishing yourself as an actual person and a lover of other topics, too.
At GoDaddy, we relish the dual simplicity and complexity of WordPress. It's a great platform to help small businesses get online, and that's pretty much what gets us out of bed in the morning. Our Managed WordPress platform is perfect for the the aspiring author, the Main Street coffee shop, or the indie musician — people who want a gorgeous, functional website without a lot of fuss or expense.
GoDaddy Email Marketing is a natural companion to the WordPress platform.
Additional resources for marketing your blog
Interested in driving even more traffic to your site? Browse these helpful resources to cover all your bases:
- 10 ways to improve Google keyword ranking. Want to boost your blog's ranking? Take note of these keyword tips.
- Meta tags and the head section of a website. Aside from adding appropriate keywords to your blog, you'll need to pay extra attention to meta data and headers.
- Pro SEO tips for driving traffic to your WordPress blog. Use these tips to squeeze as much SEO juice as possible out of your WordPress blog.
- Video: Facebook Marketing tips from Mari Smith. In this Q&A, Mari offers insight into Facebook marketing for small businesses.
- How often should you promote blog posts?. Once a day? More? Learn more here.
- How to promote your blog when you're a brick-and-mortar store. Capitalize on potential customers with a blog that speaks to their needs.
7. Make money on your blog
While there's no get-rich-quick scheme associated with growing a WordPress blog, there are a number of ways to make money with your blog. If you're looking to turn your hobby into a full-time job (or even just a side hustle to rake in a little extra cash), our experts have the tips to help you get there.
Are you wondering how to make money blogging? Yes, you certainly can. Whether you're a pro writer or a budding blogger, if you've got great topics and a killer voice, there are people looking to pay you for your skills. But remember, blogging isn't a get-rich-quick scheme — it requires work and effort. From sponsored posts to affiliate marketing, here's how to make money blogging. Let's dive in!
Write sponsored posts for your own website
Sponsored posts are articles you write, either for your own blog or someone else's site, about some product, service or company. There's a couple ways to get into sponsored posts:
- Potential sponsors contact you. Sponsors might contact you, either through outreach programs or of their own volition, to request posts for specific audiences. They'll contact you and work out a rate, but keep in mind that some sponsors offer free items in exchange for work.
- You create a page for sponsors to request a media kit containing your rates, your traffic stats and what you can offer. Media kits help you look polished and professional, and you don't have to worry about the headache of negotiating a price with sponsors.
- Become part of a blogger outreach program. There are a lot of different programs available to bloggers to get them exposed to other brands. Check out the full version of this article for a handy list.
Try affiliate marketing
With affiliate marketing, you sell other people's products and services while enjoying a percentage of the sales. The key here is not to force it — if you have a blog that talks about items, say tech gadgets, you can make suggestions to your readers without coming across as overbearing.
Join networks that do ad sharing
When an ad that's tied to your article within their network is clicked on or viewed, you get a small percentage. Here are a few ad sharing networks for bloggers:
- Hubpages
- Infobarrel
- Daily Two Cents
Join Google AdSense or other ad networks
If you want to do more than subbing work to other ad sharing platforms, consider hosting ad networks on your site. Ads can be links, banners or even video, and the potential for passive income from clicks is viable.
Add an online store
WooCommerce powers more than one-quarter of all online stores — a testament to its strength as an eCommerce platform.
While you can sell items through some integrations online with payment processing services, the ability to take a credit card and provide a transaction doesn't mean that the solution is an eCommerce solution. These solutions have the following key features:
- Product pages — provide multiple views and levels of product specifications, along with dynamic pricing capabilities and quantity adjustments.
- Shopping cart — a page or object that contains all of the items added during the shopping session. Users can update quantities or delete items.
- Checkout page — a conversion point where users can provide payment information and submit an order for fulfillment.
- Account pages — the ability for a customer to set up an account, view orders, and manage pertinent contact, delivery and payment information.
- Payment integration — the ability to accept and process credit card data, or integrate with a system like PayPal, Amazon Payments or Stripe that provides that service.
WooCommerce provides all of these features elegantly within the WordPress platform.
WooCommerce is a free plugin, with more than 350 extensions that extend its capabilities to inventory management, payment gateways, point-of-sale systems, shipping, subscriptions, reporting and many external products or internal features.
Additional resources for making money with your blog
Want to unlock the full, monetary potential of your blog? Check out these resources:
- 3 ways to make money from your WordPress site. Take a deeper dive into monetization.
- Unexpected sources for sponsored blog posts. Broaden your content horizon with these unexpected sources.
- Increase your cashflow with freelance writing jobs. Need a little extra cash in your wallet? Don't be afraid to freelance.
- Has your blog become all biz and no fun? Steer clear of the monetization trap. Money is all good and well, but don't forget why you blog. Keep your goals, readers and interests in mind.
8. Measure success and move forward
From increased traffic, to shared posts, to thought leadership and more, there are plenty of ways to measure the success of your blog. Evaluate your goals and where you'd like to go so you can move forward with a high-functioning WordPress blog.
What return does your blog offer your business? It's tough to say, because many of the benefits of blogging are intangible. There's also not a simple, clear-cut way to attach a single metric to it. The good news, however, is that you don't have to fly blind any longer. By applying a simple, old-school copywriting framework, you'll soon have a better understanding of visitors to your blog and know how to make changes that will attract and keep more of them.
Why a blog's success is hard to measure
The most beneficial aspects of blogging (and social media in general) — namely awareness or thought leadership — are typically intangible and somewhat abstract. That's makes it tough to quantify your results, and that which cannot be measured cannot be improved, or perhaps more fundamentally, justified.
The other complicated issue is that blogging (and social media) is mostly serendipitous. The guy or gal who hits one of your blog posts today might not make a purchase for weeks or even months, but it was your blog that introduced them to your business.
Compare that to something a more straightforward, like Google AdWords, where the benefits (or lack thereof) are transparent, letting you see exactly how much money is spent and how much is returned in revenue.
So if it's tough to measure conversions, where do you begin analyzing progress?
Why an age-old copywriting acronym should guide your analytics
AIDA is a copywriting framework that has been used for decades to move people through an advertisement or piece of content, hitting on all the key influential stages before eventually purchasing.
Awareness, the first step, is obviously about grabbing their attention with the headline and lead. Next your goal is to build Interest and keep them reading long enough until they start to Desire what you're offering. If all goes well, Action is the next logical step. And we all like action.
It's a simple idea, but it offers a basic framework that can also be applied to any website or blog — the steps are the same. Initially, your goal is to attract attention. Only then can you build trust with people and provide an easy transition into the more "commercial" areas of your site.
How to tell if your blog is 'working' with AIDA and analytics
Start by identifying at least one or two metrics for each category that we defined above. The following are a few recommendations to help get you started, but ultimately it's up to you to determine which metrics might be the most appropriate for your own blog or business.
- Attention: Unique visitors and traffic sources
- Interest: Bounce rate, time on site, and average pages per visit
- Desire: Conversions (such as email signups and freebie downloads)
- Action: Sales!
Creating a Custom Dashboard in Google Analytics will help eliminate all of the distraction and over-abundance of information. Under Dashboards in Google Analytics, click New Dashboard, and begin adding "Widgets" for each new metric to track. You can also choose between a simple numbers-based metric, or view the information as a graph or chart:
Just getting a few basic metrics up and running will help. However, the real benefit will be in comparing this information to your results over the past 30 days, previous quarter, or even prior year. Inserting additional context like this will help you see which way your results are trending.
How to use 'AIDA' analytics to fix your blog
AIDA provides a fantastic framework for optimizing your site. Start with Awareness, say, by working on increasing the number of social shares per blog post by making sharing options more prominent.
Next is Interest. When you have a potential customer on-site, ideally you keep them around and improve your bounce rate through providing additional options for them to continue reading.
Then focus on Desire. This is where you latch onto your customer with micro-conversions (which happen before a purchase). This is good time to go after email subscription opt-in so you can send updates.
Finally, we have Action. This should be the result of all previous steps, which many times might look like a Pricing page, where interested people can now take a look at their options for becoming a customer.
The most important thing is to test and measure.
Not bad, eh? Of course, we're just scratching the surface here, but I hope that the above examples give you some inspiration. The most important thing is to test and measure! Make changes, measure the effect, then react accordingly.
7 tips to boost your blog post's performance
When you hit publish, how can you be sure that your post is going to stand out from the rest?
- Did you cover the topic extensively? Is there a way you can provide more information, or perhaps a different angle/viewpoint?
- Do you provide helpful external resource links? Link to relevant and credible sites with more information.
- Did you sprinkle tweetables throughout the text? Identify one or two catchy and short quotes that would make good tweets. Embed a tweet button right in your post so all someone has to do is click the button and tweet out the quote with a linkback to your post.
- Have you organized the copy with attractive dividers and images? Use block quotes, headings, bulleted lists and images to break your text into bite-sized chunks.
- Does your headline grab the reader's attention and describe the post accurately? Create a title that accurately describes the post and at the same time, adds some suspense or sparks curiosity.
- Have you embedded any relevant Pinterest boards? If your post fits well with Pinterest, create a pinnable graphic and embed it into the post so a reader can simply add it to their board with one click.
- Is there a call-to-action at the end of the post? What do you want your reader to do at the end of the post?
The internet at large would have you believe that if it's not hot, new and now, it's useless junk. But this is simply not true: Your older blog content still has value. Here are some things you can do to breathe new life into archived posts:
- Push them out in tweets. Create a list of pithy descriptions for your greatest hits posts — ideally two or three pre-written tweets per post to keep your feed from looking canned — and schedule them in between newer content.
- Reference them in related posts. Many blogs have "related post" widgets that highlight three or four archived gems at the end of each new post. You've likely written about certain themes and topics repeatedly, and directing readers to your past posts reminds readers about the depth of your expertise.
- Re-post on holidays or when you're vacationing. If you blog while vacationing, you'll definitely keep the readers coming … but you won't actually be vacationing. Consider lining up some archived favorites to publish automatically so you can enjoy time away from your laptop.
- Mention in newsletters or link roundups. Both newsletters and link roundups should focus mainly on current content, but there's no reason you can't include a "posts you might have missed" section.
- Offer them as guest posts. Guest posting is a fantastic way to reach audiences beyond your own and build relationships with other bloggers. It's also time-consuming and generally low on the priority list. The next time you get a guest post request, consider offering a refreshed and revived post from your archive.
If you're looking ahead to build out an editorial calendar for the coming year, it's a great time to conduct a blog audit to assess what's working for your blog. By optimizing your proven, high-performing content, you can supplement your new content and develop a content strategy that's sure to turn heads. Repurposing, republishing, and monetizing previously published blog content can lighten your workload and increase revenue.
Additional resources for measuring success and improving your performance
Want to take your blog to the next level? Check out these resources to prep your WordPress blog for continued success:
- Recycle! Stop making your content strategy a one-hit wonder. Don't let old content go to waste. Learn what you could do with previously published posts to invigorate your content strategy.
- 8 easy ways to become a faster, more efficient blogger. Want to avoid writing slumps? Check out these tips to keep your blog prolific and engaging.
- Google PageSpeed Insights. Check your blog's page loading speed.
- Learn how lazy loading (done right) can speed up your WordPress site's page load time. Learn how to load resources on your site — only when the user needs them.
That's a wrap
You did it. You worked your way through this guide, and now you're armed with all the resources and knowledge you could need to start a WordPress blog. Whether you decide to use one or all of the tools and advice we discussed, you've won. Take a look at all that you've accomplished. It's pretty nice, isn't it?
Now that you're ready to take your blog to the next level, check out our 5-step blogger business plan.
How To Create A Wordpress Blog On Godaddy
Source: https://www.godaddy.com/garage/how-to-start-and-grow-a-wordpress-blog/
Posted by: jamescithys.blogspot.com
0 Response to "How To Create A Wordpress Blog On Godaddy"
Post a Comment